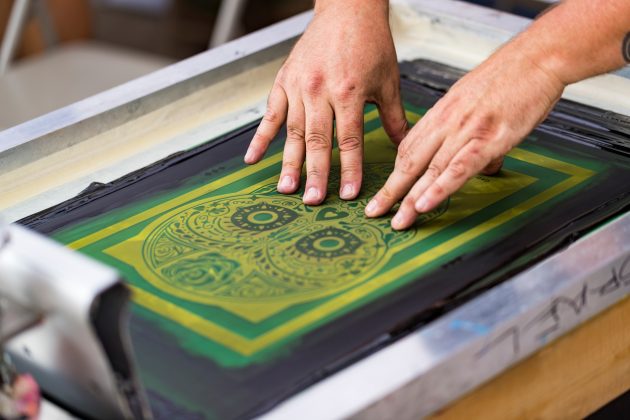
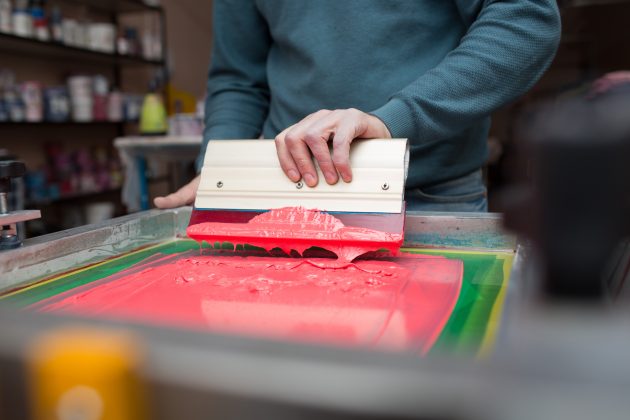
Screen printing, also known as silkscreen printing or silk screening, is a method of printing stenciled graphics on a shirt. The process involves pushing ink onto the fabric using a squeegee or a rubber blade through a mesh screen. The pushing of paint or ink onto the clothing will leave an imprint. While fabric is a commonly-used material, you can screen print designs on any flat surface like wood and paper.
It’s a cheap and easy way to apply a customized design to clothing. Many individuals and companies avail themselves of the services of screen-printing shops to create personalized shirts for work or casual wear. Despite their affordability, shirts with screen-printed graphics tend to be high-quality, especially from reputable shops. Hence, people often bulk buy orders by the tens or hundreds.

But how does screen printing work? It isn’t a highly complex process. In fact, with the proper equipment, you can even print your own shirt designs in the comfort of your own home. So, here’s how the process works:
1. Create Your Design
If you want superior screen printing results from a reputable silkscreen service provider, you’ll first need a design to print on a shirt. You can sketch an image traditionally using pencil and paper or create it on an art program. Then you have to transfer the design onto a transparent acetate film. The film will serve as the model for the stencil. So, if your design has multiple colors and layers, you may need to have different stencils per color.
You can visit a shirt printing service to create the stencils and put your design on your clothing. They’ll also provide a palette of colorful hues that won’t wash off no matter how frequently you launder your shirts. The prints on staff uniforms or daily wear also tend to stay on longer.
2. Select A Screen
The screen used in this specific printing process is almost similar to a mesh screen of a screen door. The only difference is that the printing screen is secured in a wooden frame and has smaller holes.
A printing service may allow you to choose the type of screen with your desired mesh count, which is the number of fibers per square inch. The higher the mesh count, the finer the details your design will have on the shirt. These screens preserve more ink than their lower mesh count counterparts with bigger openings. Hence, more ink flows out from the latter.

3. Prepare And Expose The Emulsion
Once you’ve chosen your mesh screen, the printing service will coat it with emulsion to prevent ink from flowing through. Green and yellow are the usual colors for mesh screens, and all of these supplies can be found on sites such as PerfecPressHTV. This step results in a green-and-yellow cover, yellow being the usual color for mesh screens. There’s no need to worry when this happens since this won’t affect the final print.
The emulsion layer comes in three common types:
- SBQ-based: This is the more expensive option, but it cures quickly and is suitable for highly-detailed print designs. It’s also known as a ‘one-pot’ emulsion.
- Diazo: This is cheaper yet requires prolonged exposure. It’s not recommended for prints with finer details.
- Dual-cure: This is a combination of the first two types. It needs mixing, though it cures faster than Diazo and is relatively more affordable than SBQ.
A professional shirt print service provider should know which one to use depending on your design. Once ready, they’ll put the transparent acetate film on the mesh screen and expose it under a bright light to harden and develop the emulsion. This process requires multiple steps if your design has more than one color. But it’s a vital stage to take if you want that perfect statement t-shirt every fashionista has in their closet.
4. Do Extra Touch-Ups
Since light exposure hardens the emulsion, any part of the screen covered by your design remains liquid. The unhardened emulsion will be washed away, leaving the screen with a perfect stencil ready for printing. The screen will dry, and the printer will make additional corrections before laying it on the printing board.
5. Print The Design
Here comes the exciting part. The shirts to be printed will be laid flat on the printing board, or the press, as others call it. Then the emulsified mesh screen will lay right on top of the fabric. The press will lower the screen onto the shirt so the squeegee can transfer the ink to the cloth evenly. The shirt should absorb the thick ink mixture, and the design soon settles.
Depending on how detailed and colorful the design is, the process may need several runs because of the number of stencils. Despite that, you’ll end up with a shirt with your design printed perfectly, colors and all.
6. Heat Cure The Finished Product
Last but not least, the shirt will undergo a heat curing process in a dryer. This step ensures a smooth and stable application of your design. So, no matter what laundry detergent you use for it in the wash, it’ll stay on for a long time.
Conclusion
Personalized designs can go on clothing through various methods, but screen printing is still the most straightforward and popular way. You can produce a bulk number of shirts bearing the same design through this printing process without cutting back on the colors and vibrancy.